Differential measurement of geometric values
in production and the laboratory
- For strain gauges, potentiometers and standard signals
- Limits/peak-value buffer
- Multichannel model
- High sampling rate
- Measured values can be transferred via PROFIBUS, RS232 or analog output
- Powerful software tool available for data analysis and data logging
TASK
The SENSORMASTER 9163 covers a wide range of applications in which process values need to be measured, displayed, analysed and transferred to higher-level control systems. Typical applications include measuring geometric parameters in production, for instance using differential measurements, or testing material properties in the laboratory.
SPECIFIC REQUIREMENT
- High sampling rate
- Using DigiVision analysis software to record the measurement data via a PC
SOLUTION
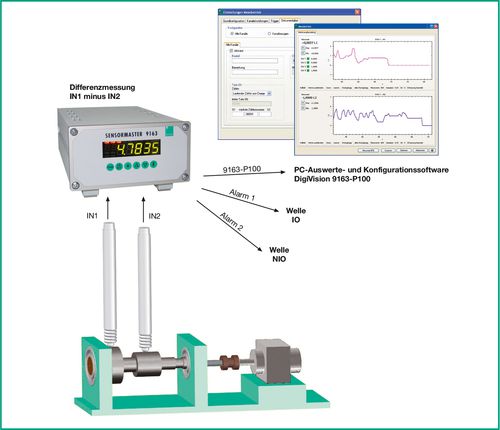
As part of the quality assurance process, the shaft is tested for true running, bow and concentricity of the bearing surfaces. The test also includes measuring the diameter of the shaft bearings. In the test, the shaft is clamped in a holder and turned by a motor while being measured by two displacement sensors. The instrument measures the difference between the signals from these two sensors; this difference is only allowed to vary within a specified tolerance band. The SENSORMASTER 9163 performs the difference calculation and assesses the results. As this process takes just a few seconds, both random sampling and 100% testing are possible. If the shaft does not lie within the tolerance band, the SENSORMASTER 9163 outputs an alarm signal.
Go to product SENSORMASTER 9163
Sectors
Downloads


